company
type
role
team
-
Ai Visualization
Ai Expert
-
Abstract
Style Shift is an AI driven content creation project that transforms real products into expressive AI generated characters while preserving full visual authenticity. The project is built on four core pillars: consistency, detail oriented rendering, accurate product representation, and seamless outfit transition. These elements ensure that each output reflects the true shape, texture, and identity of the original product while allowing the character to evolve through smooth and visually coherent style changes.

Mood Boarding
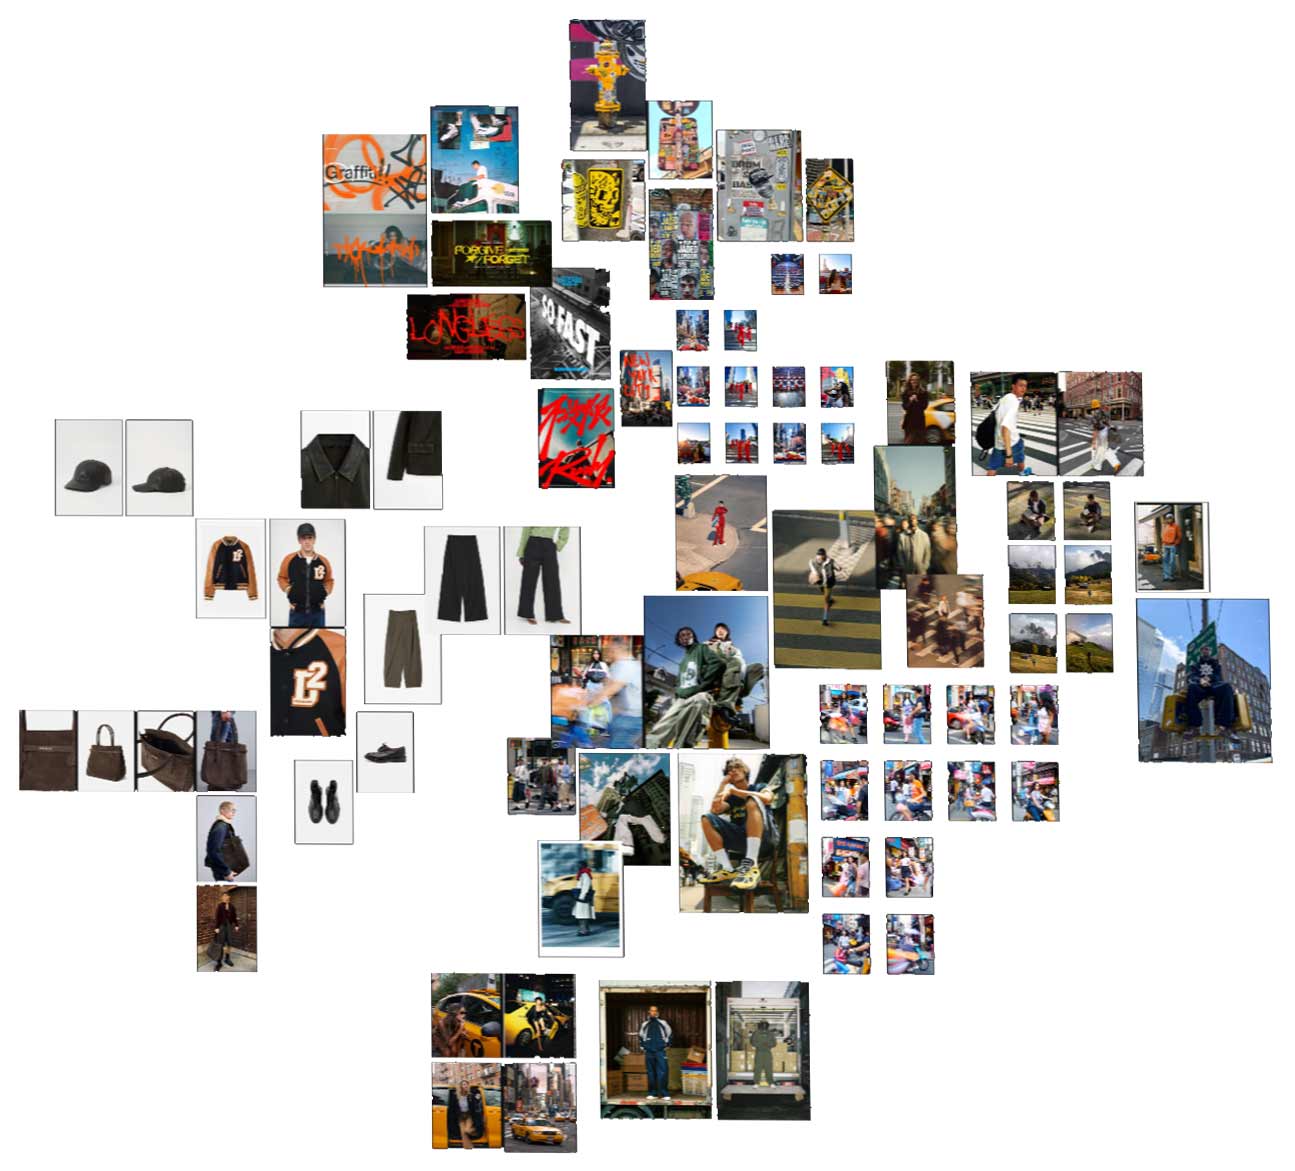
For the moodboarding process, I used Adobe Firefly Boards to develop and expand the visual identity of the project. This stage allowed me to gather references, explore color direction, define style cues, and shape the overall aesthetic language. By combining curated imagery with AI-assisted variations, I could quickly test different moods, compositions, and design concepts.
Adobe Firefly Boards helped organize these ideas into a clear visual roadmap, making it easier to refine the tone, textures, environments, and fashion elements that guide the entire project. This foundational step ensured that every creative decision stayed aligned with the intended atmosphere and artistic vision.
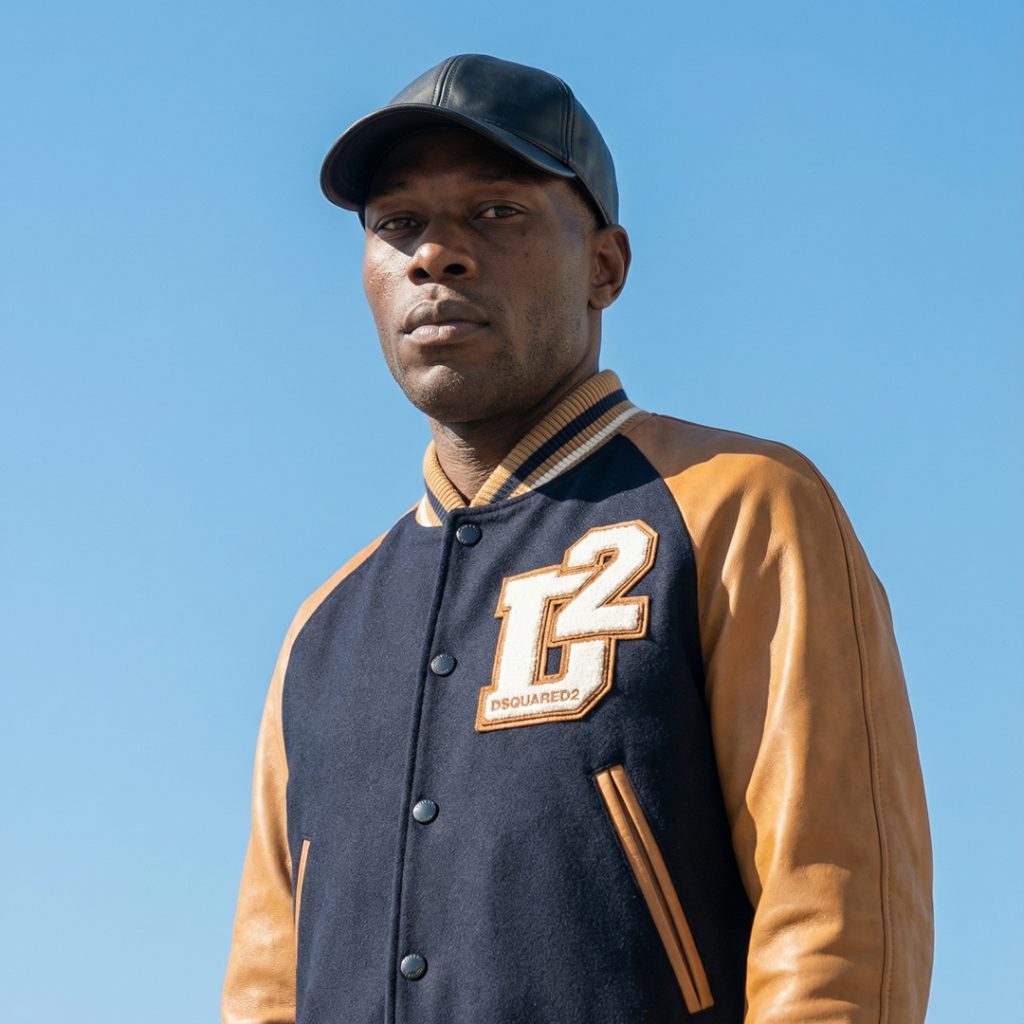
Character Development
Character Development is closely guided by the moodboarding stage, ensuring that every visual decision aligns with the established aesthetic direction. Using the references and visual themes gathered in Adobe Firefly Boards, I shape each character’s identity to match the tone, style, and atmosphere defined in the mood boards.
This process includes selecting skin tones, age ranges, facial features, hairstyles, and overall personality traits that reflect the intended world of the project. The characters are crafted to embody the mood board’s color palette, fashion cues, lighting style, and emotional tone. Each iteration is refined until the character feels like a natural extension of the aesthetic vision.
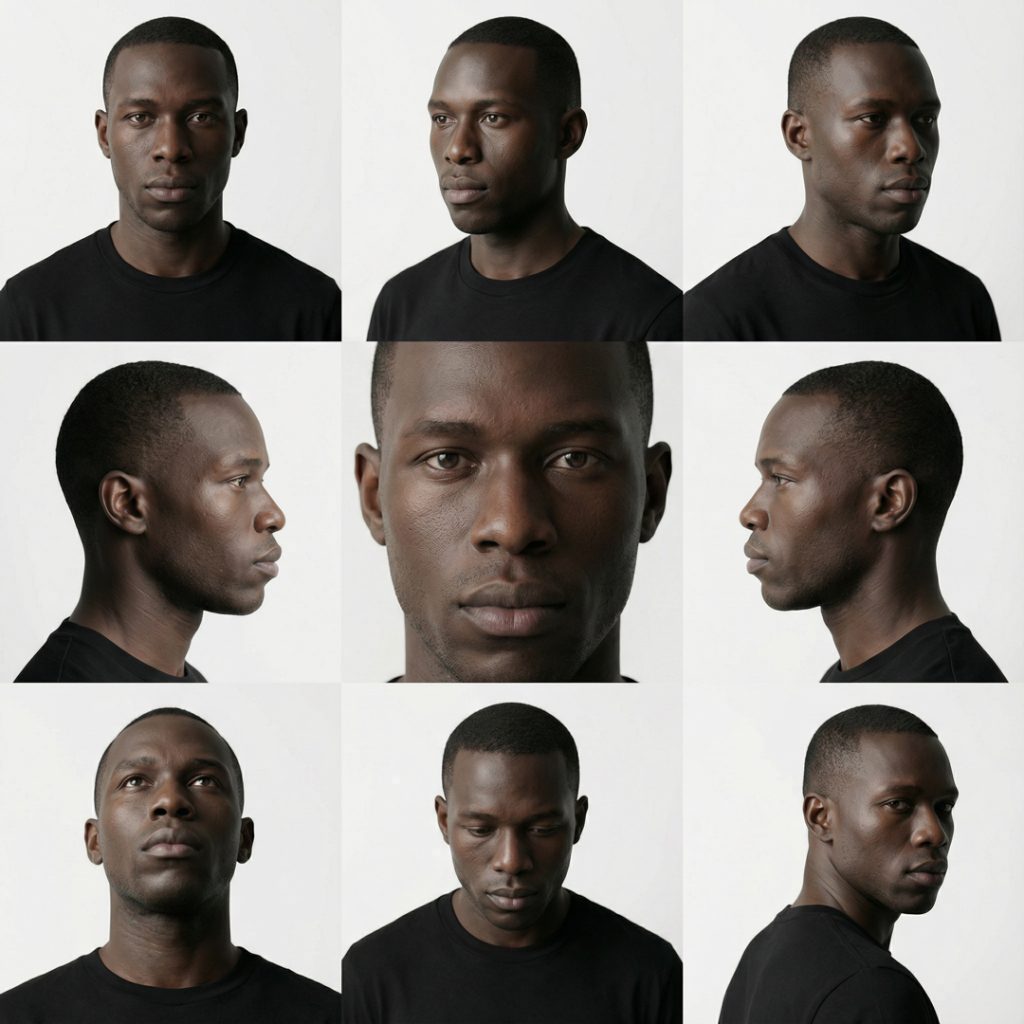
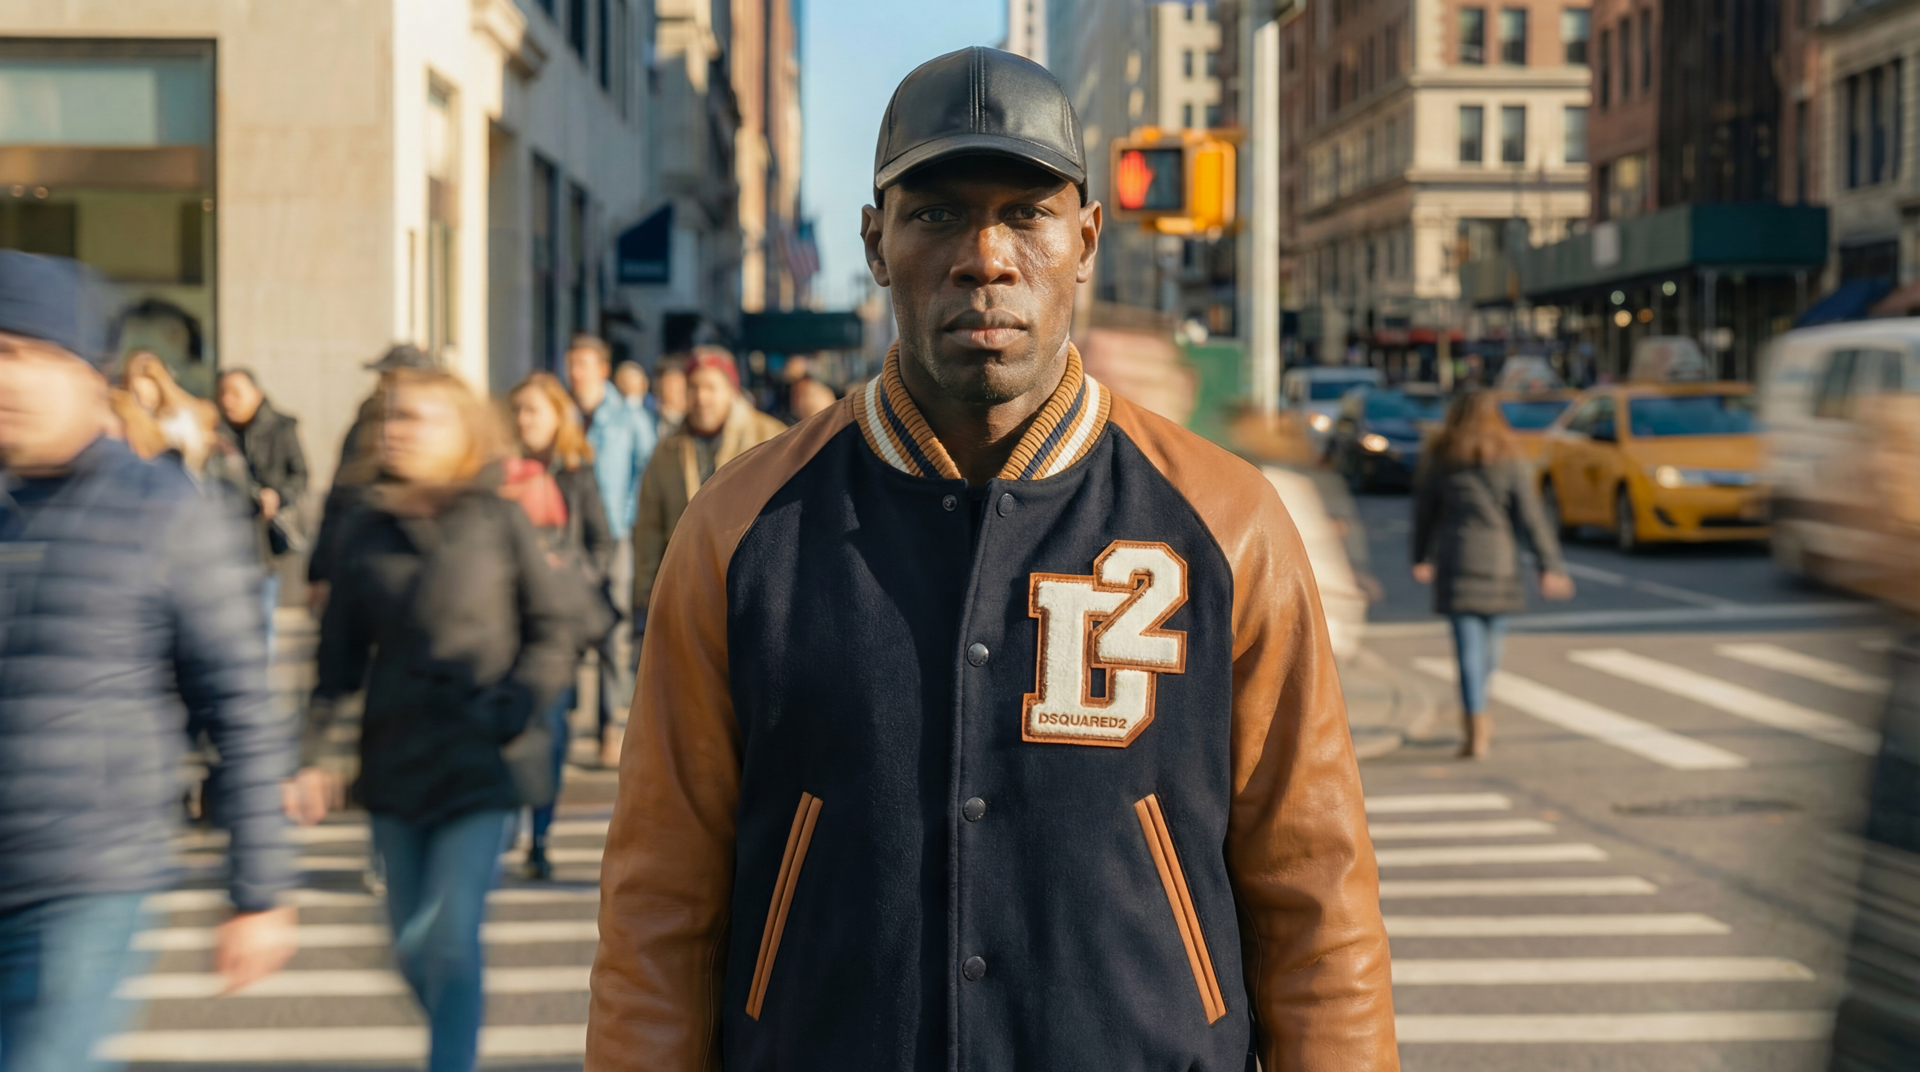
Ultra realistic studio portrait of a Black man in his late twenties, facing camera, head and shoulders centered. Smooth deep brown skin with subtle texture, short closely cropped black hair, natural hairline, clean shaven face. Strong jawline, straight nose, full lips, slightly serious neutral expression, relaxed brows, direct confident eye contact with the viewer. Symmetrical face, no smile. Wearing a plain black crew neck t shirt with no logos. Soft studio lighting from the front and slightly above, gentle shadows under the jaw and cheekbones, clean white to very light gray seamless background. High resolution, sharp focus on eyes and facial features, natural color grading, no stylization, photographic look.
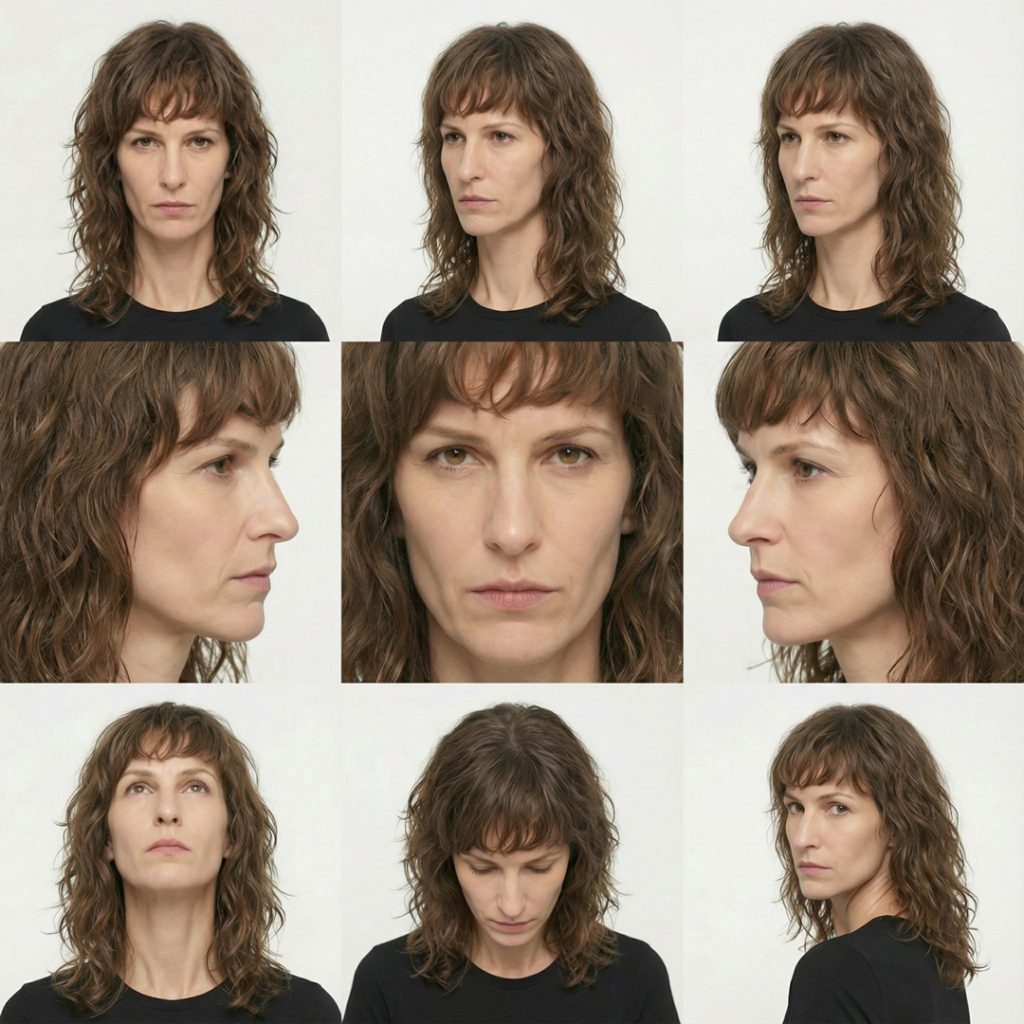
Ultra realistic studio portrait of a white woman in her late thirties to early forties, facing camera, head and shoulders centered. Light skin with natural texture and fine lines, long wavy medium brown hair with subtle highlights, layered cut with bangs that fall slightly over the forehead and frame the face. Narrow jawline, straight nose, thin lips, calm almost stern neutral expression, relaxed but focused eyes looking directly at the viewer. Minimal or no visible makeup. Wearing a plain black crew neck top with no logos. Soft even studio lighting from the front with a slight top direction, subtle shadows around the nose and under the chin, clean white to very light gray seamless background. High resolution, crisp focus on eyes and hair strands, natural color grading, no stylization, photographic look.
Outfit Adjustment
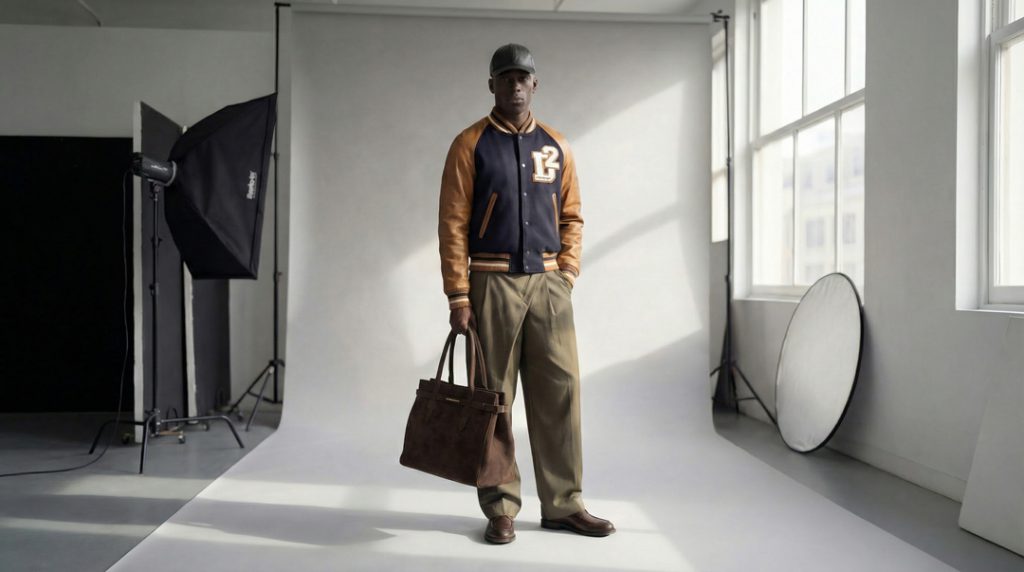
Outfit Adjustment is the stage where the characters evolve into fully styled visual assets. I use Nano Banana Pro to place clothing on the models with precise alignment, fabric accuracy, and natural body contouring. This allows each outfit to sit correctly on the character while preserving realistic folds, texture, and silhouette.
After the clothing is applied, Nano Banana Pro is used again to explore poses and different contextual scenarios. This includes natural body movement, dynamic posture variations, and scene integration that matches the lighting and visual tone of the original portrait.
The result is a consistent character who can transition through outfits, poses, and environments while maintaining the same identity, proportions, and overall realism.
<instruction>
Analyze the entire composition of the input image. Identify the key subjects present: the model and the suede designer handbag (same color, size, texture, and structure as in the reference). Make sure the logos are accurate based on the second and third uploaded images
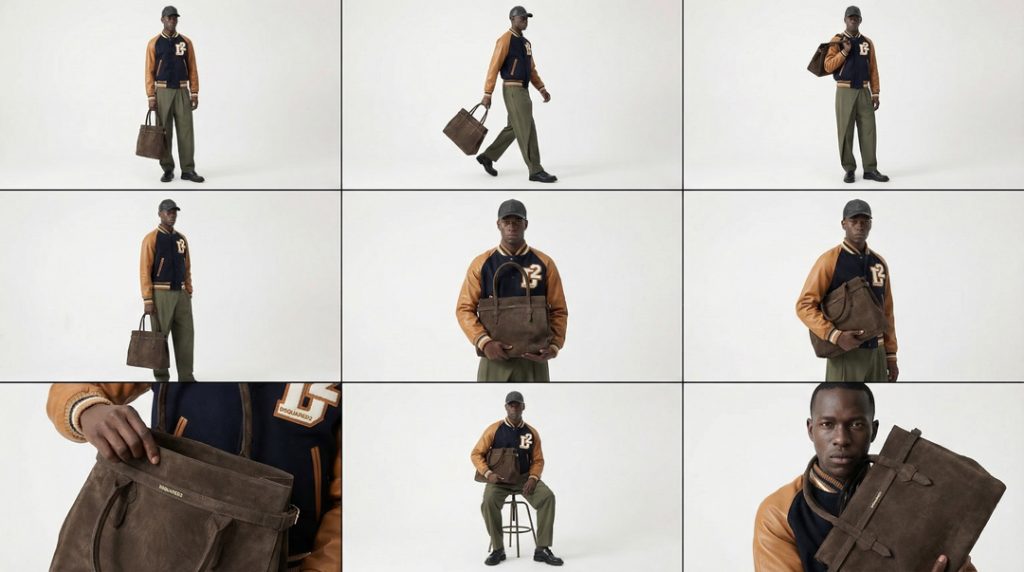
Generate a cohesive 3x3 grid “Editorial Fashion Bag Pose Sheet” featuring 9 distinct poses of the same model in the same environment.
All poses must highlight the handbag in different editorial, high-fashion ways while maintaining wardrobe, lighting, and styling continuity.
**Row 1 (Full-Body Poses — Showing the Bag in Motion & Lifestyle):**
1. **Full-Body Neutral Hold:** Model standing naturally, holding the bag in one hand down by their side. Clean silhouette.
2. **Full-Body Walking Pose:** Model mid-step, the bag swinging gently from the hand. Dynamic, runway-inspired.
3. **Shoulder Carry Pose:** Model holding the bag over the shoulder with relaxed confidence, showing strap placement and scale.
**Row 2 (Three-Quarter & Mid-Body Poses — Fashion-Focused):**
4. **Three-Quarter Side Hold:** Model turned slightly, holding the bag at waist level, showing its profile.
5. **Waist-Up Front Hold:** Model holding the bag with both hands at chest or waist height, showcasing the front panel and details.
6. **Crossbody or Arm-Cradled Pose:** Bag resting in the crook of the arm (luxury, elegant), or worn crossbody if straps allow.
**Row 3 (Detail & High-Fashion Poses — Attitude & Craftsmanship):**
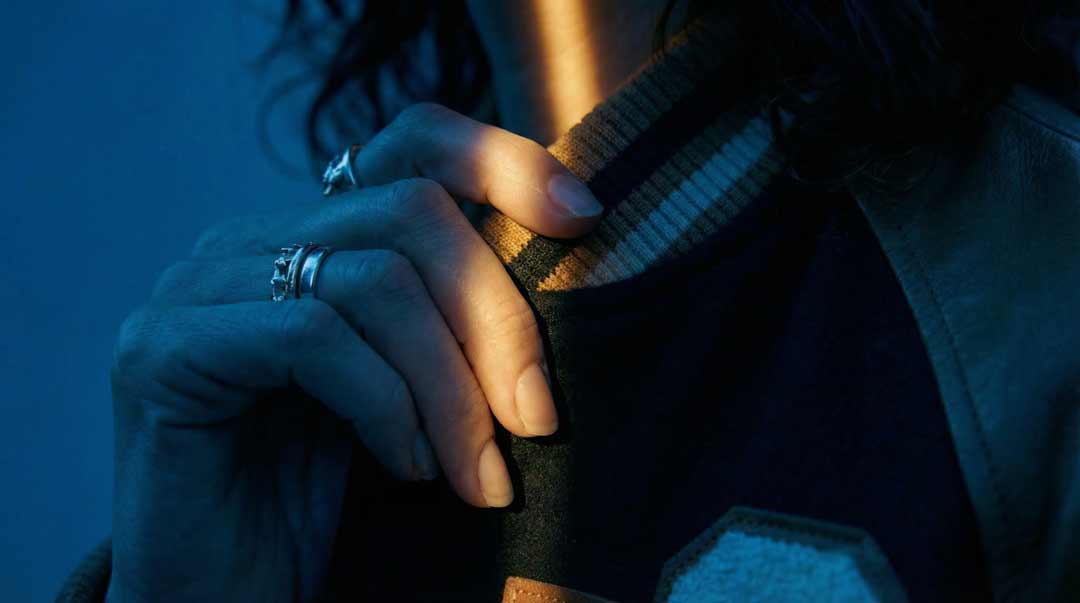
7. **Close-Up With Hand Interaction:** Model opening the bag, touching the handle, or highlighting the suede texture and hardware.
8. **Seated With Bag Pose:** Model seated, bag placed on lap, beside them, or held with a sculptural pose emphasizing shape.
9. **High-Fashion Expression Pose With Bag:** Tight framing on the model’s upper body holding the bag near the face or shoulder—strong editorial attitude.
Maintain strict consistency: same model, same bag, same outfit, same lighting, same environment, same color grading across all 9 panels. The bag’s suede texture, stitching, proportions, and handle shape must remain identical in every pose.
</instruction>
A professional 3x3 editorial fashion storyboard grid containing 9 panels.
The grid showcases the model interacting with the handbag in a cohesive high-fashion narrative.
**Top Row:** Lifestyle and full-body bag poses.
**Middle Row:** Fashion-forward three-quarter and waist-up poses.
**Bottom Row:** Detail, seated sculptural pose, expression-driven portrait with bag.
All frames feature photorealistic textures, refined editorial lighting, and accurate reproduction of the bag’s suede surface and structure.
<instruction>
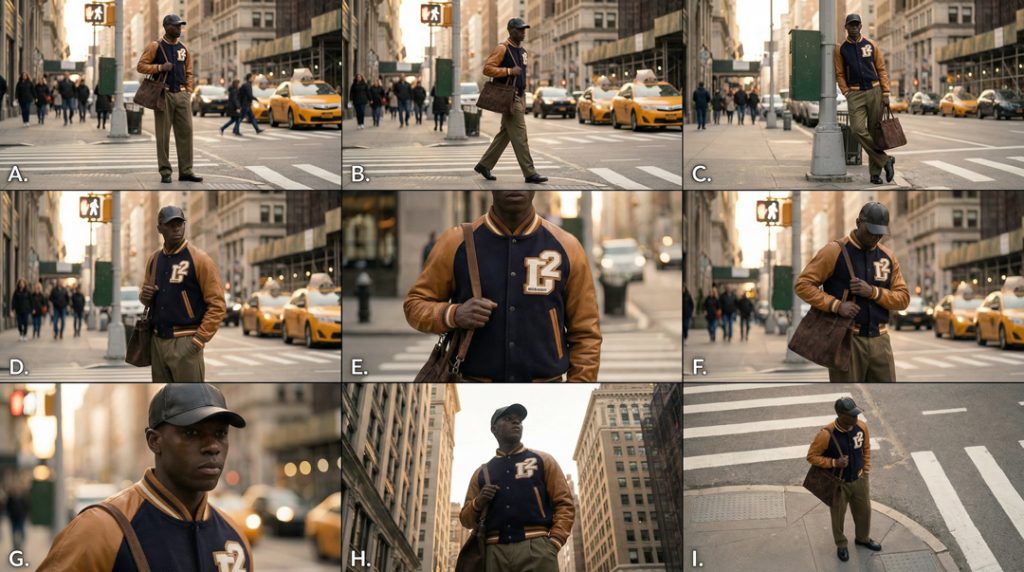
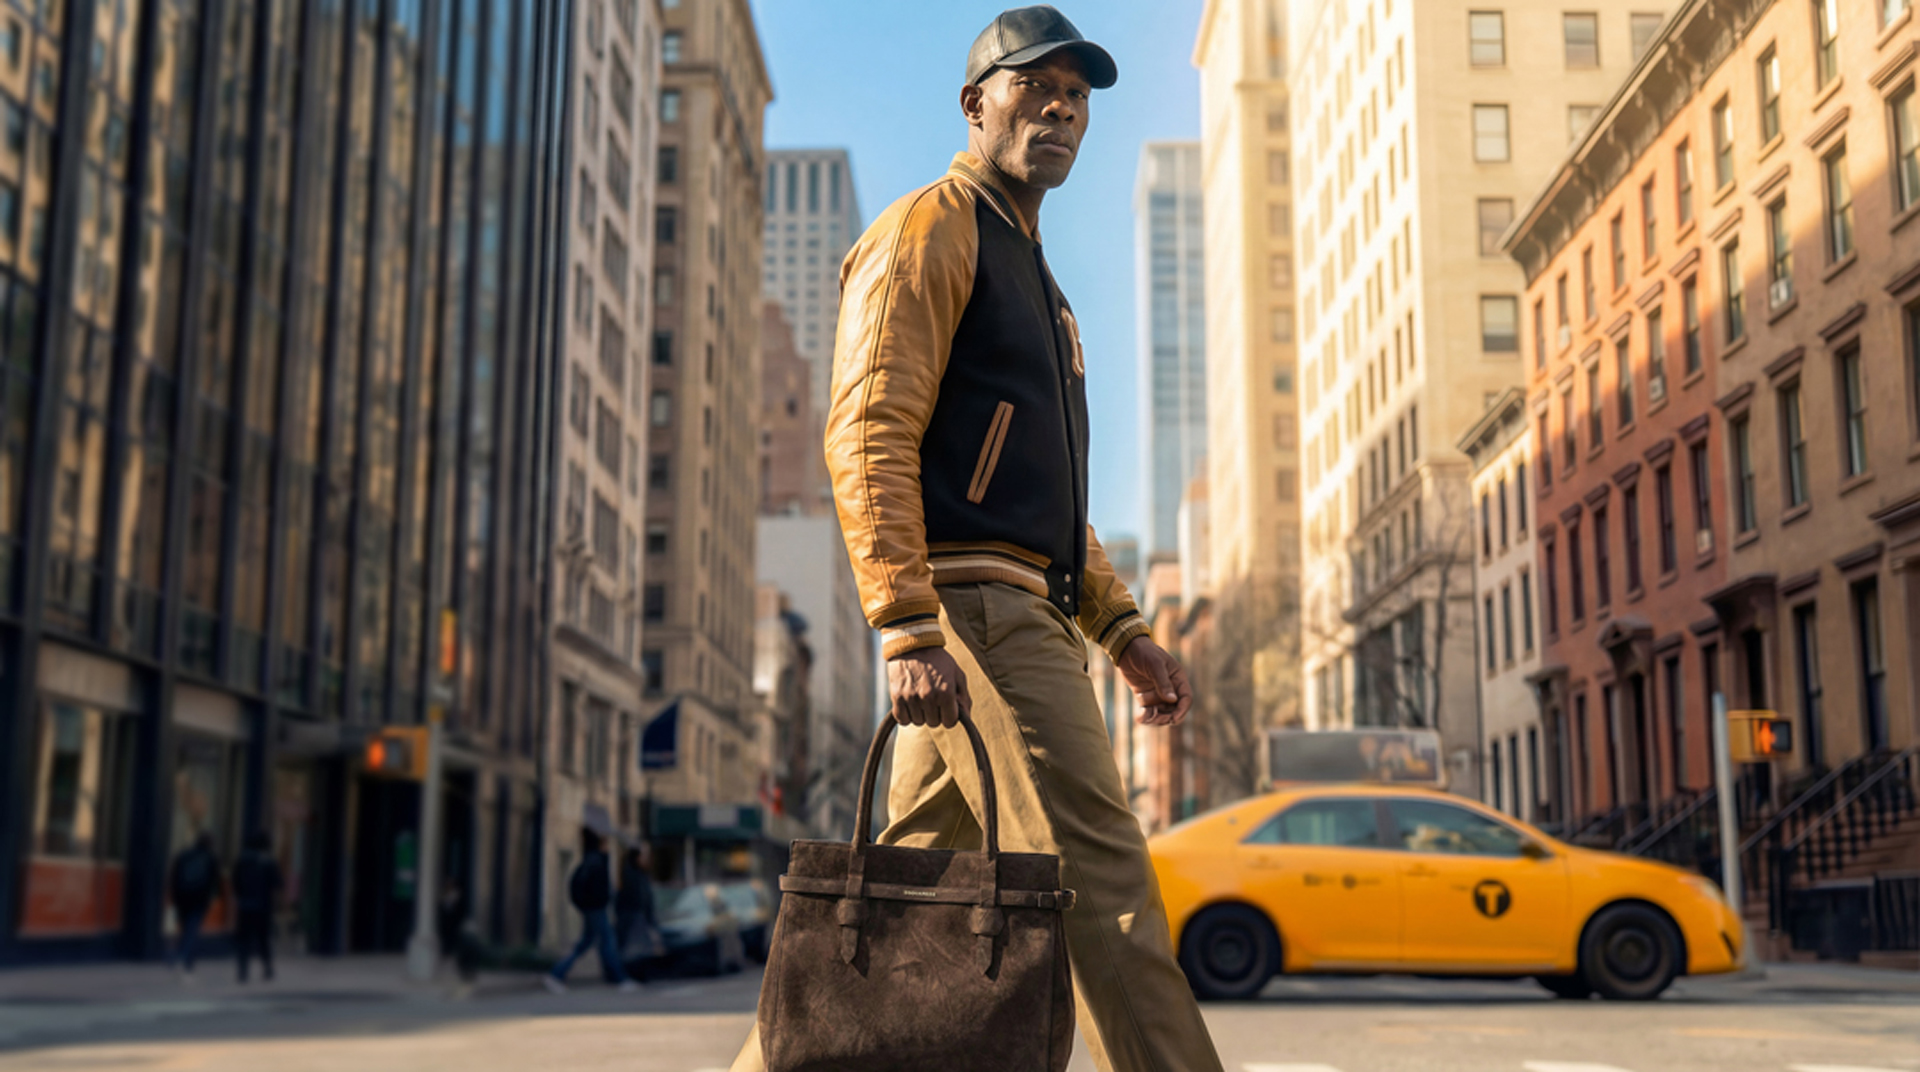
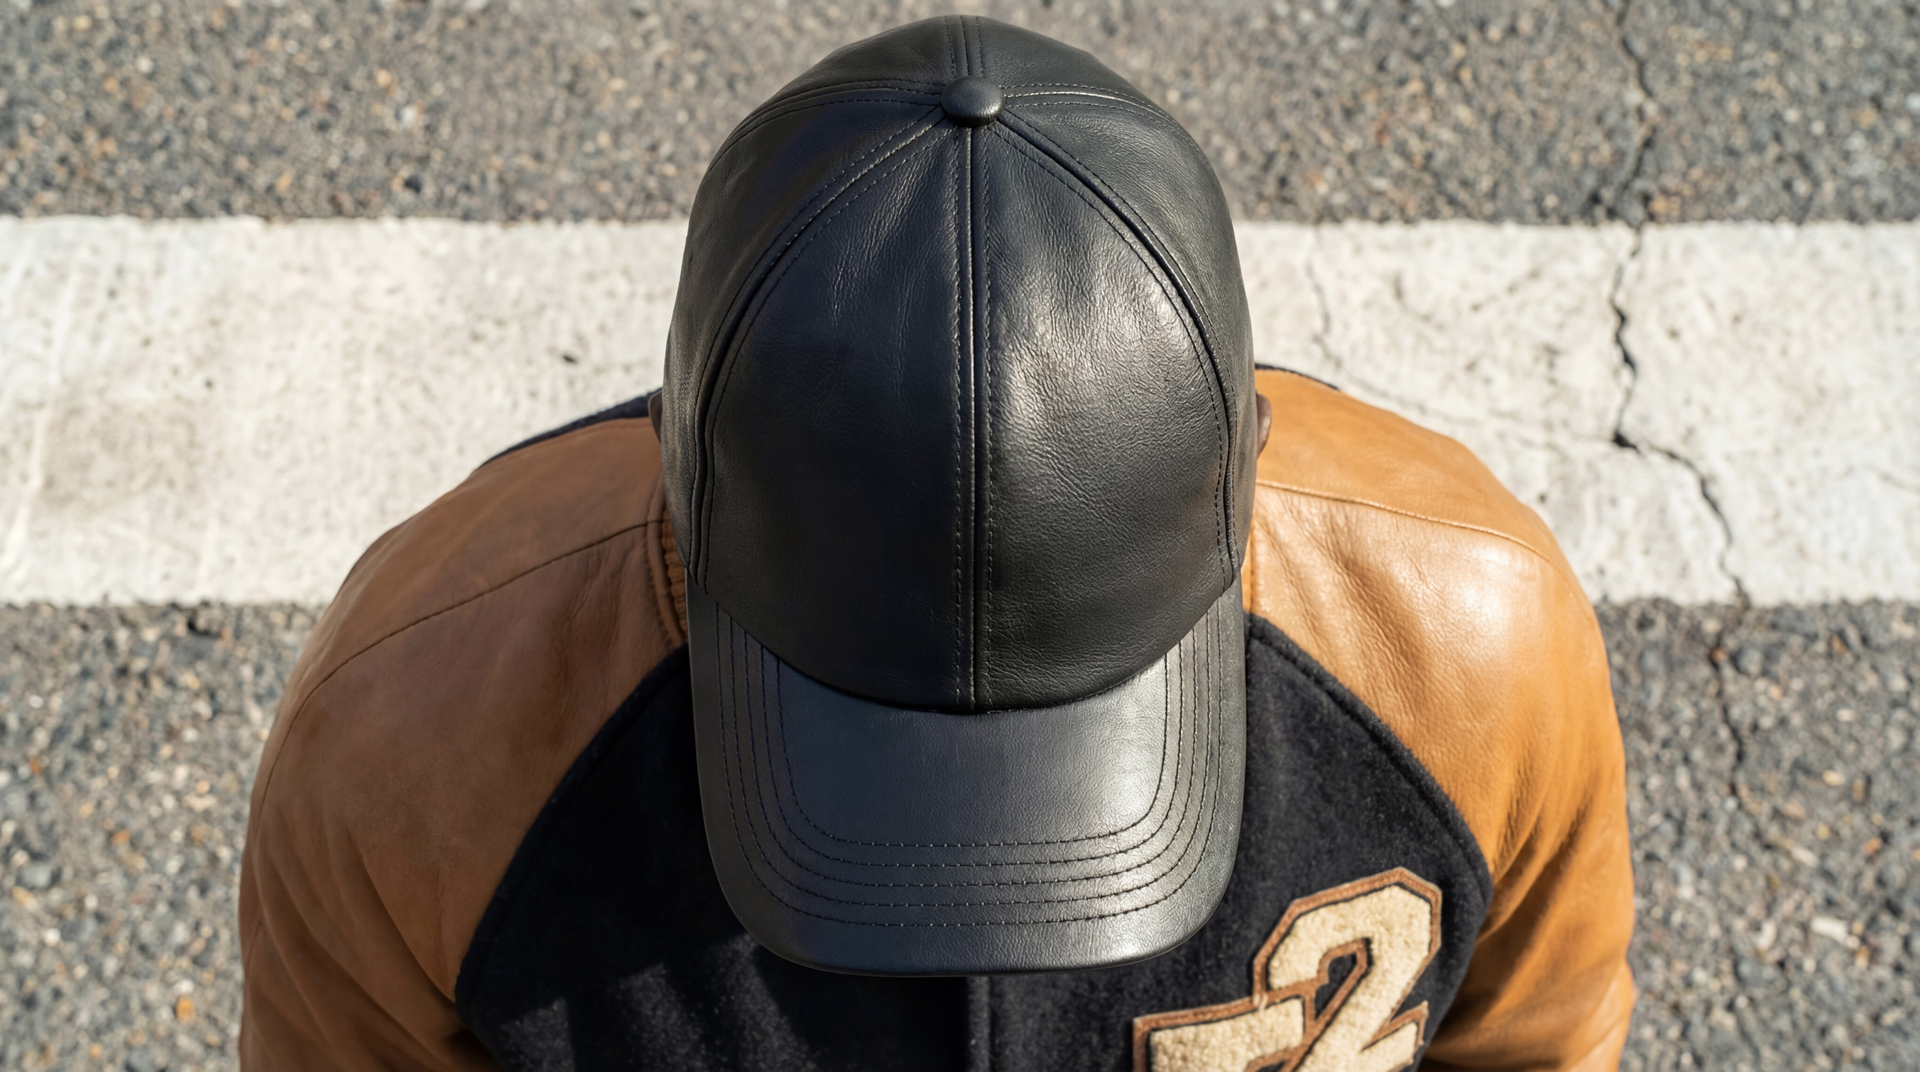
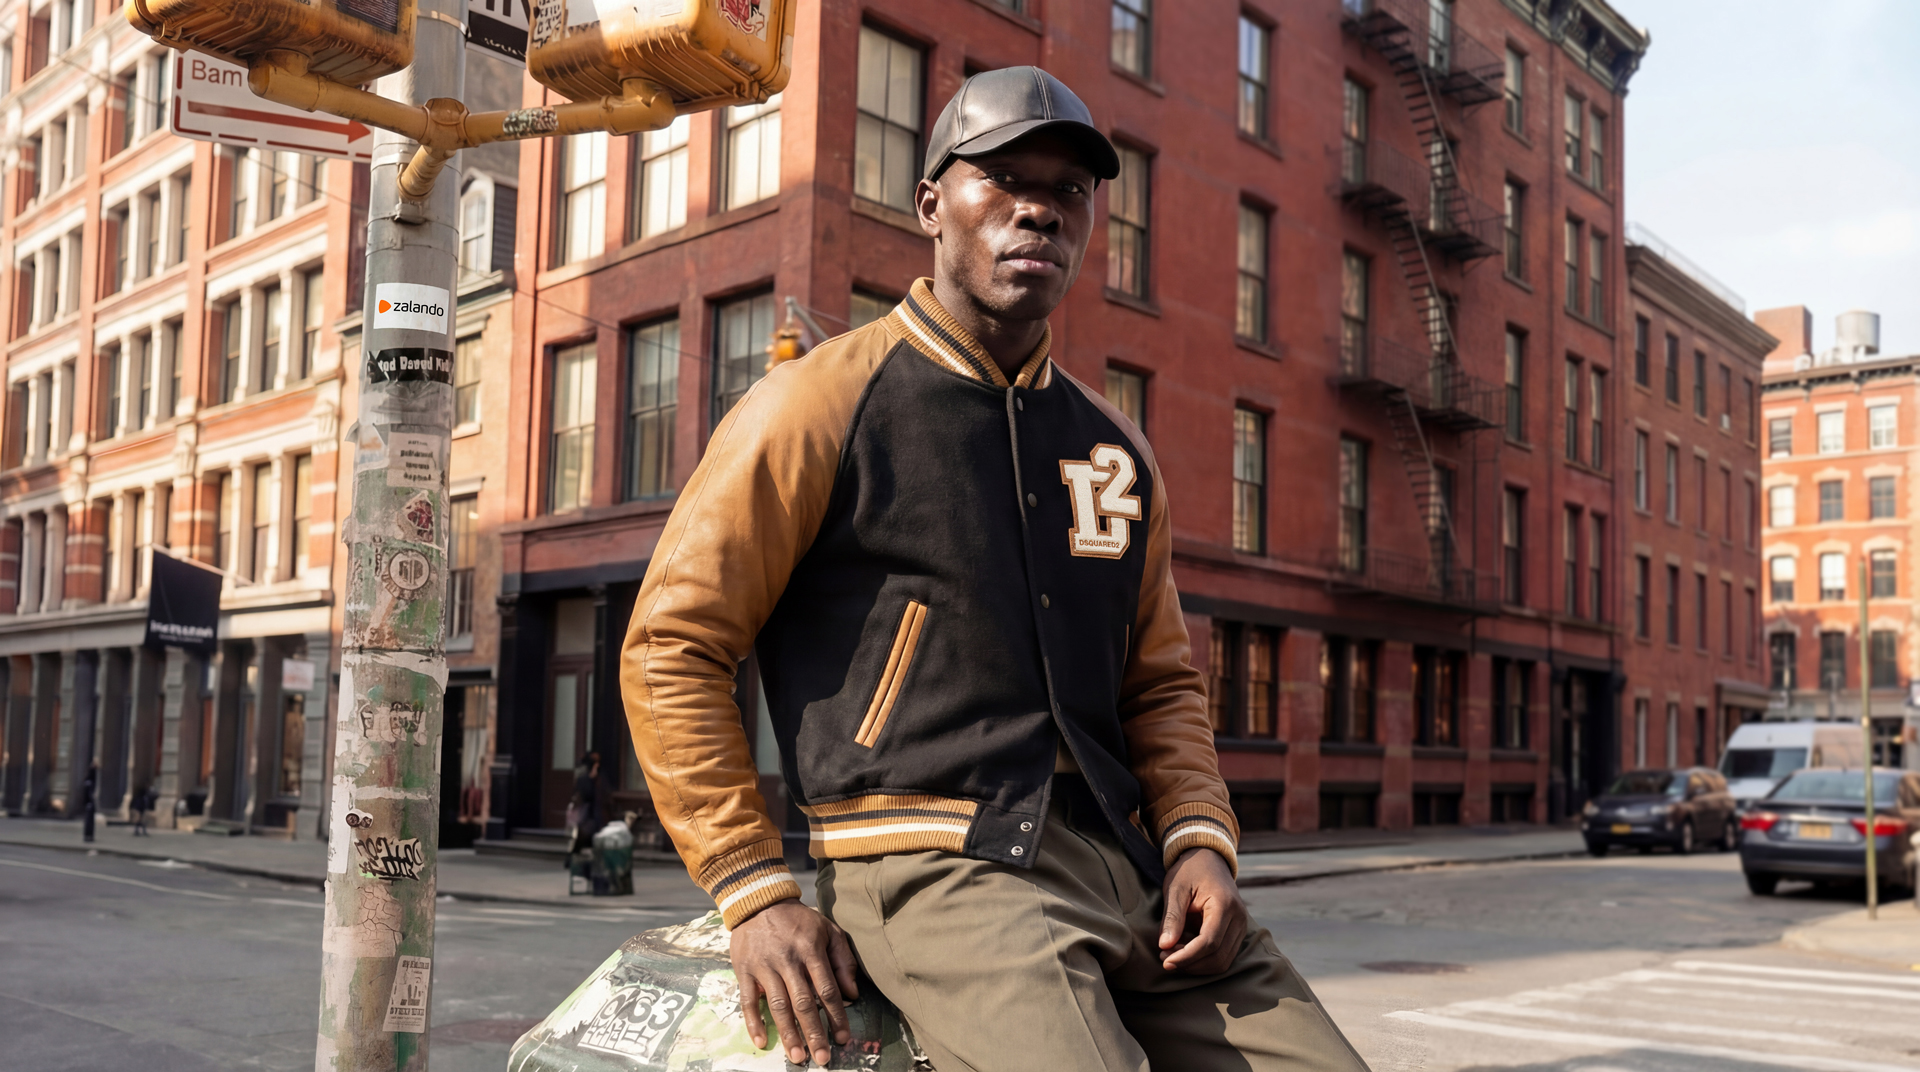
Analyze the entire composition of the input image. Identify the key subjects: the male model, his varsity jacket, trousers, cap, leather shoes, and the large suede bag slung over his shoulder.
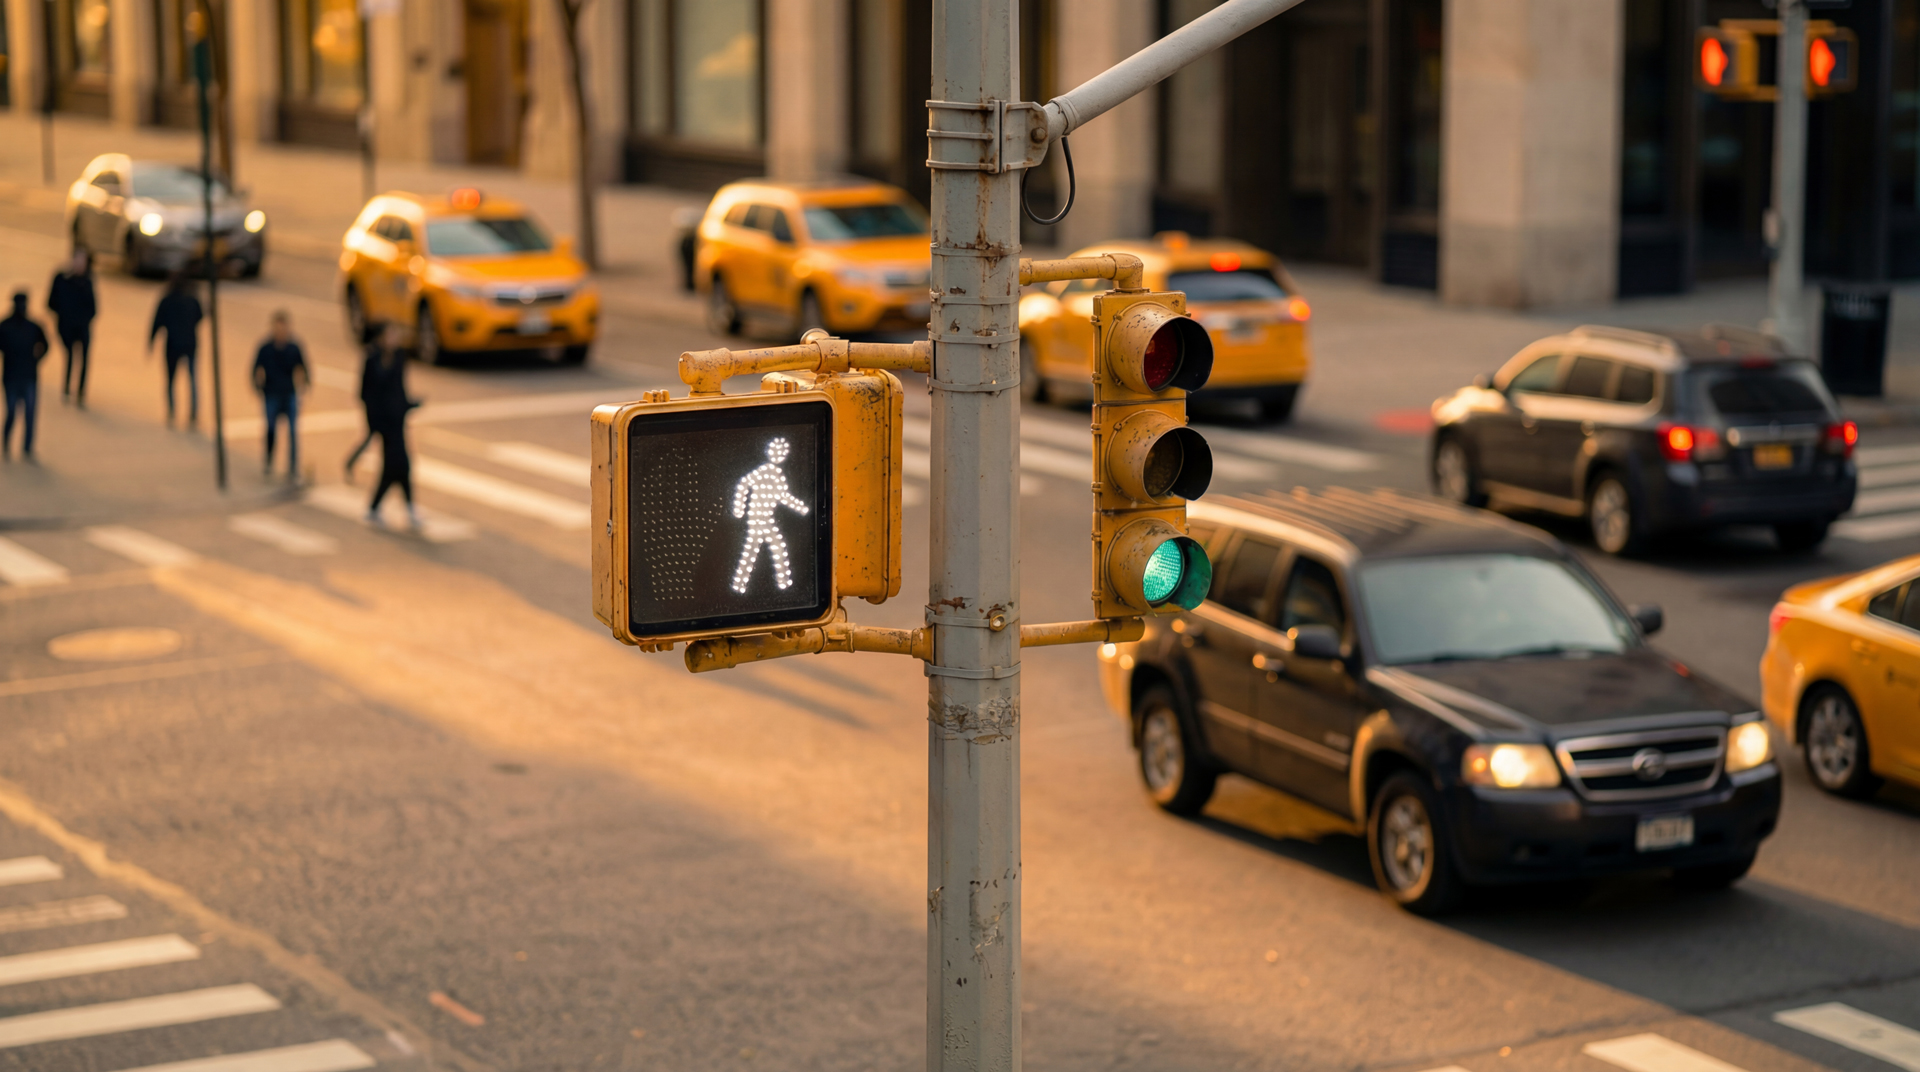
Also note the urban street-corner environment with crosswalks, taxis, warm afternoon light, and the green metal utility box he is leaning on.
Generate a cohesive 3×3 grid “Editorial Fashion Pose Sheet (Letter Grid)” featuring 9 distinct editorial poses of the same model in the same environment.
Maintain identical styling, lighting, mood, and wardrobe. Only the model’s pose, stance, or interaction with the bag changes.
**Row 1 — Full-Body Editorial Poses (Environmental Context)**
A. **Full-Body Neutral Stance:** Model standing naturally at the corner, relaxed posture, bag on shoulder.
B. **Walking Editorial Shot:** Model stepping across the crosswalk, bag swinging slightly, confident movement.
C. **Leaning Pose Variation:** Model leaning on the metal utility box with one foot against it, bag held in hand.
**Row 2 — Mid-Body Poses (Fashion Details & Attitude)**
D. **Three-Quarter Torso Pose:** Model facing slightly sideways, one hand in pocket, bag resting behind him.
E. **Waist-Up Editorial Shot:** Highlight jacket details, patches, leather sleeves, and bag strap on shoulder.
F. **Bag Interaction Pose:** Model adjusting the bag strap or gripping the bag handle for a lifestyle fashion look.
**Row 3 — Close & Dramatic Editorial Angles**
G. **Close-Up on Upper Body:** Focus on face, cap, collar, jacket texture, and the top of the bag.
H. **Low Angle Hero Shot:** Shot upward toward the model, giving a strong editorial silhouette with the city behind him.
I. **High Angle Urban Portrait:** Shot slightly downward to integrate crosswalk lines and pavement graphics as part of the composition.
Ensure strict consistency: same model, same wardrobe, same bag, same time of day, same background, same cinematic lighting.
The only changes across A–I should be pose, angle, and bag interaction.
</instruction>
A professional 9-panel letter-labeled editorial fashion storyboard.
**Row A–C:** Full-body environmental fashion.
**Row D–F:** Torso-level poses and bag styling.
**Row G–I:** Close-ups, low/high angles, and attitude-driven editorial portraits.
Photorealistic texture, clean color grading, and urban lifestyle fashion aesthetic throughout.
story board
The Story Board stage focuses on shaping visual narratives around the developed characters. I use this technique to build structured sequences that guide the flow of each concept. By combining consistent character renders with controlled outfit transitions, pose variations, and contextual elements, I can explore a wide range of possible scenarios.
This method allows rapid experimentation with composition, camera angles, emotional tone, and environment design. Each frame becomes part of a coherent visual story that supports product presentation, campaign planning, or creative exploration. The result is a clear roadmap that helps define how the characters will move, interact, and evolve within the project.
Stills
For the still image generation, I primarily used Nano Banana Pro, which gives me high control over detail, lighting, and character consistency. In a few specific cases, I used Seedearem 4.5 to achieve certain editorial looks or refine complex compositions.
All prompts used in this stage are carefully fine-tuned for an editorial fashion campaign aesthetic. They focus on clean composition, expressive styling, polished lighting, and professional-grade realism.
You can explore the exact prompts by clicking the button located below the gallery, where each prompt is presented for transparency and creative insight.
Guardrail
Guardrail is the stage dedicated to fine tuning accuracy and ensuring that every visual element matches the real product. To achieve precise detail, I isolate any problematic areas by cropping specific sections of the image. These focused segments are then processed in Nano Banana Pro, where I adjust shapes, textures, materials, and alignment until they perfectly reflect the physical product.
This method allows me to correct even the smallest inconsistencies, maintain brand authenticity, and preserve the integrity of the design across all generated images. By applying targeted refinements, the final visuals remain consistent, realistic, and fully aligned with the true product specifications.
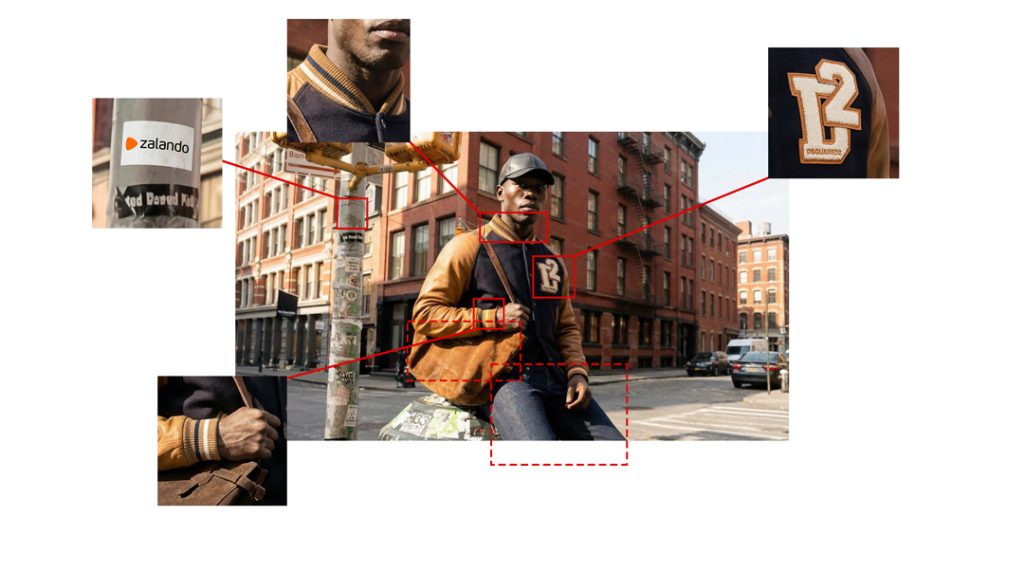
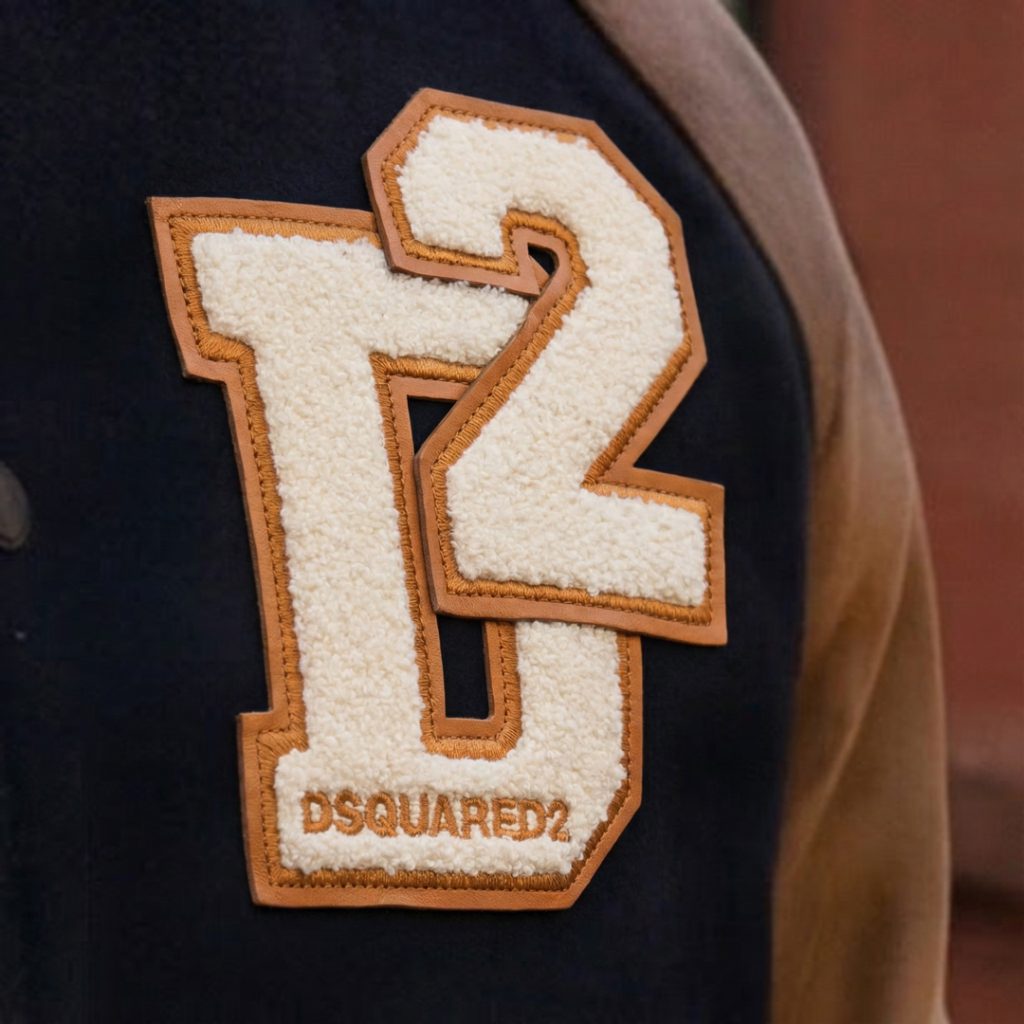
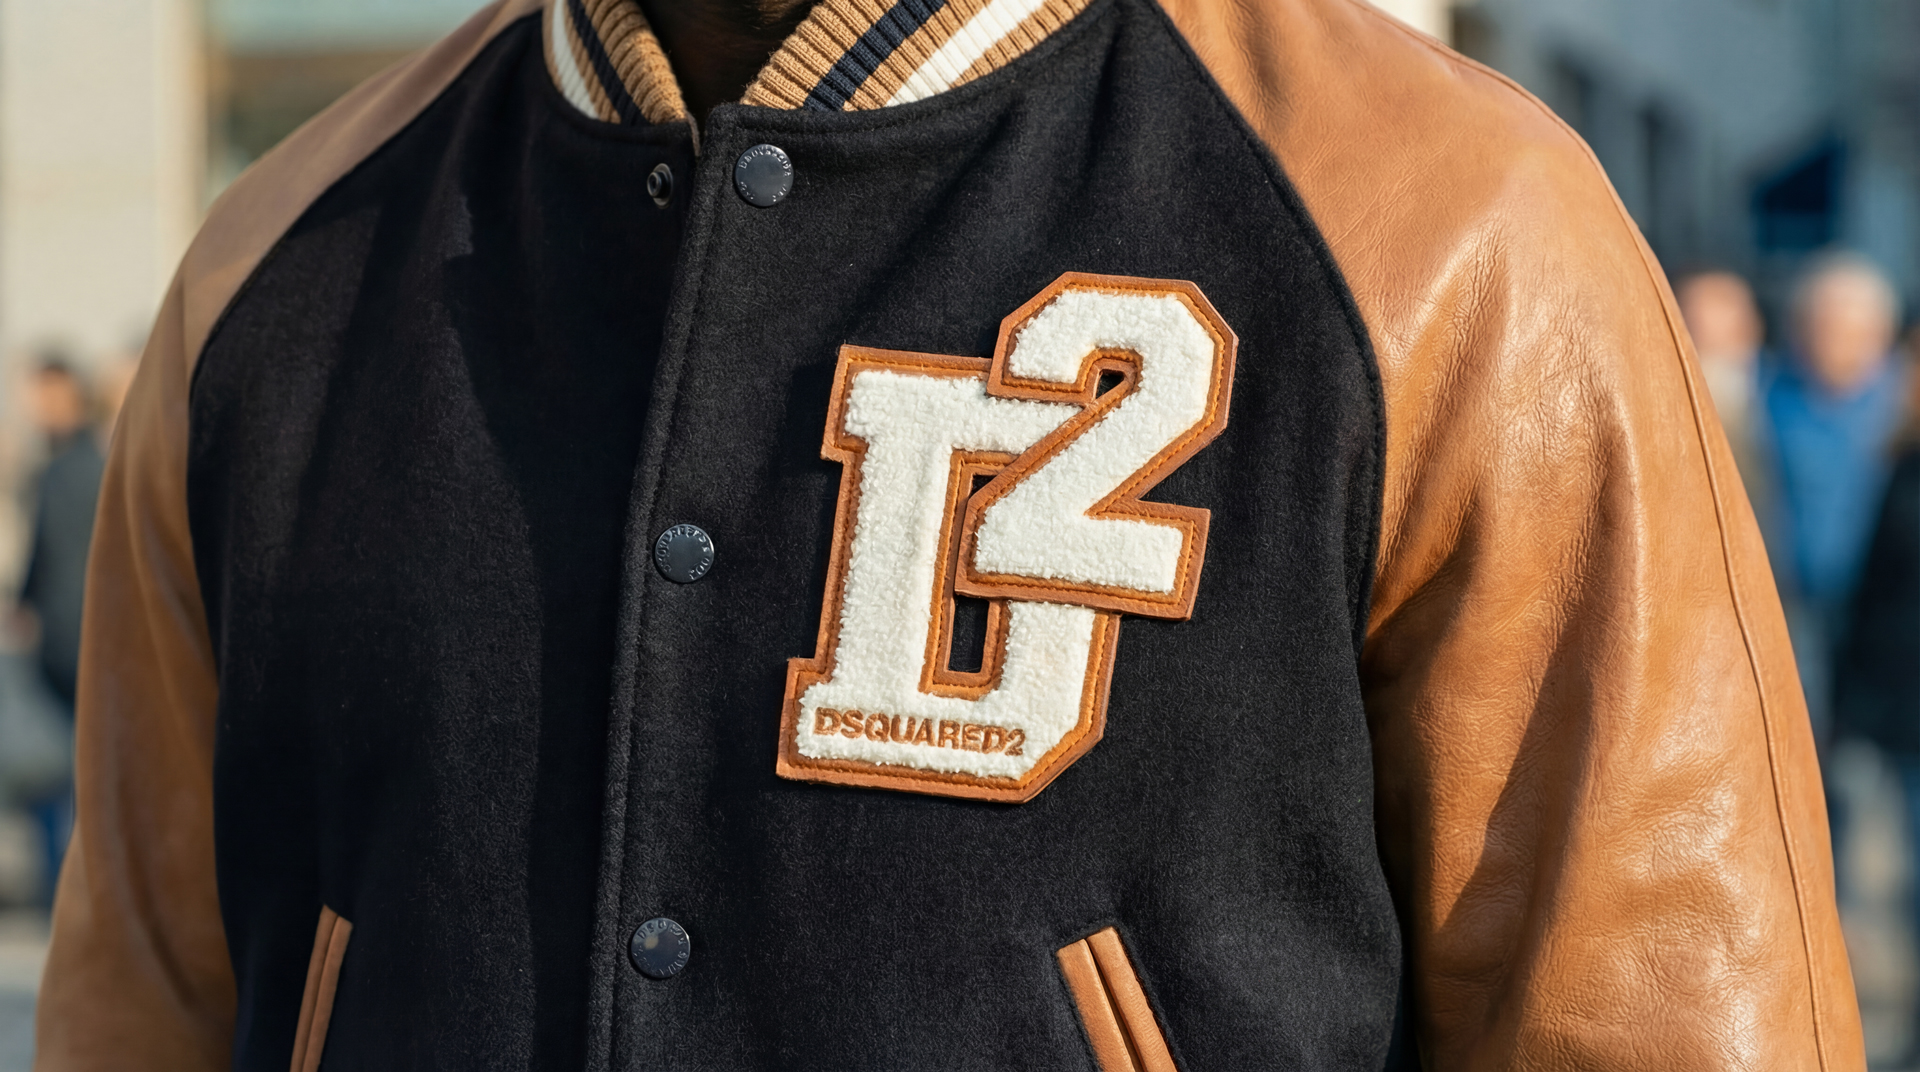
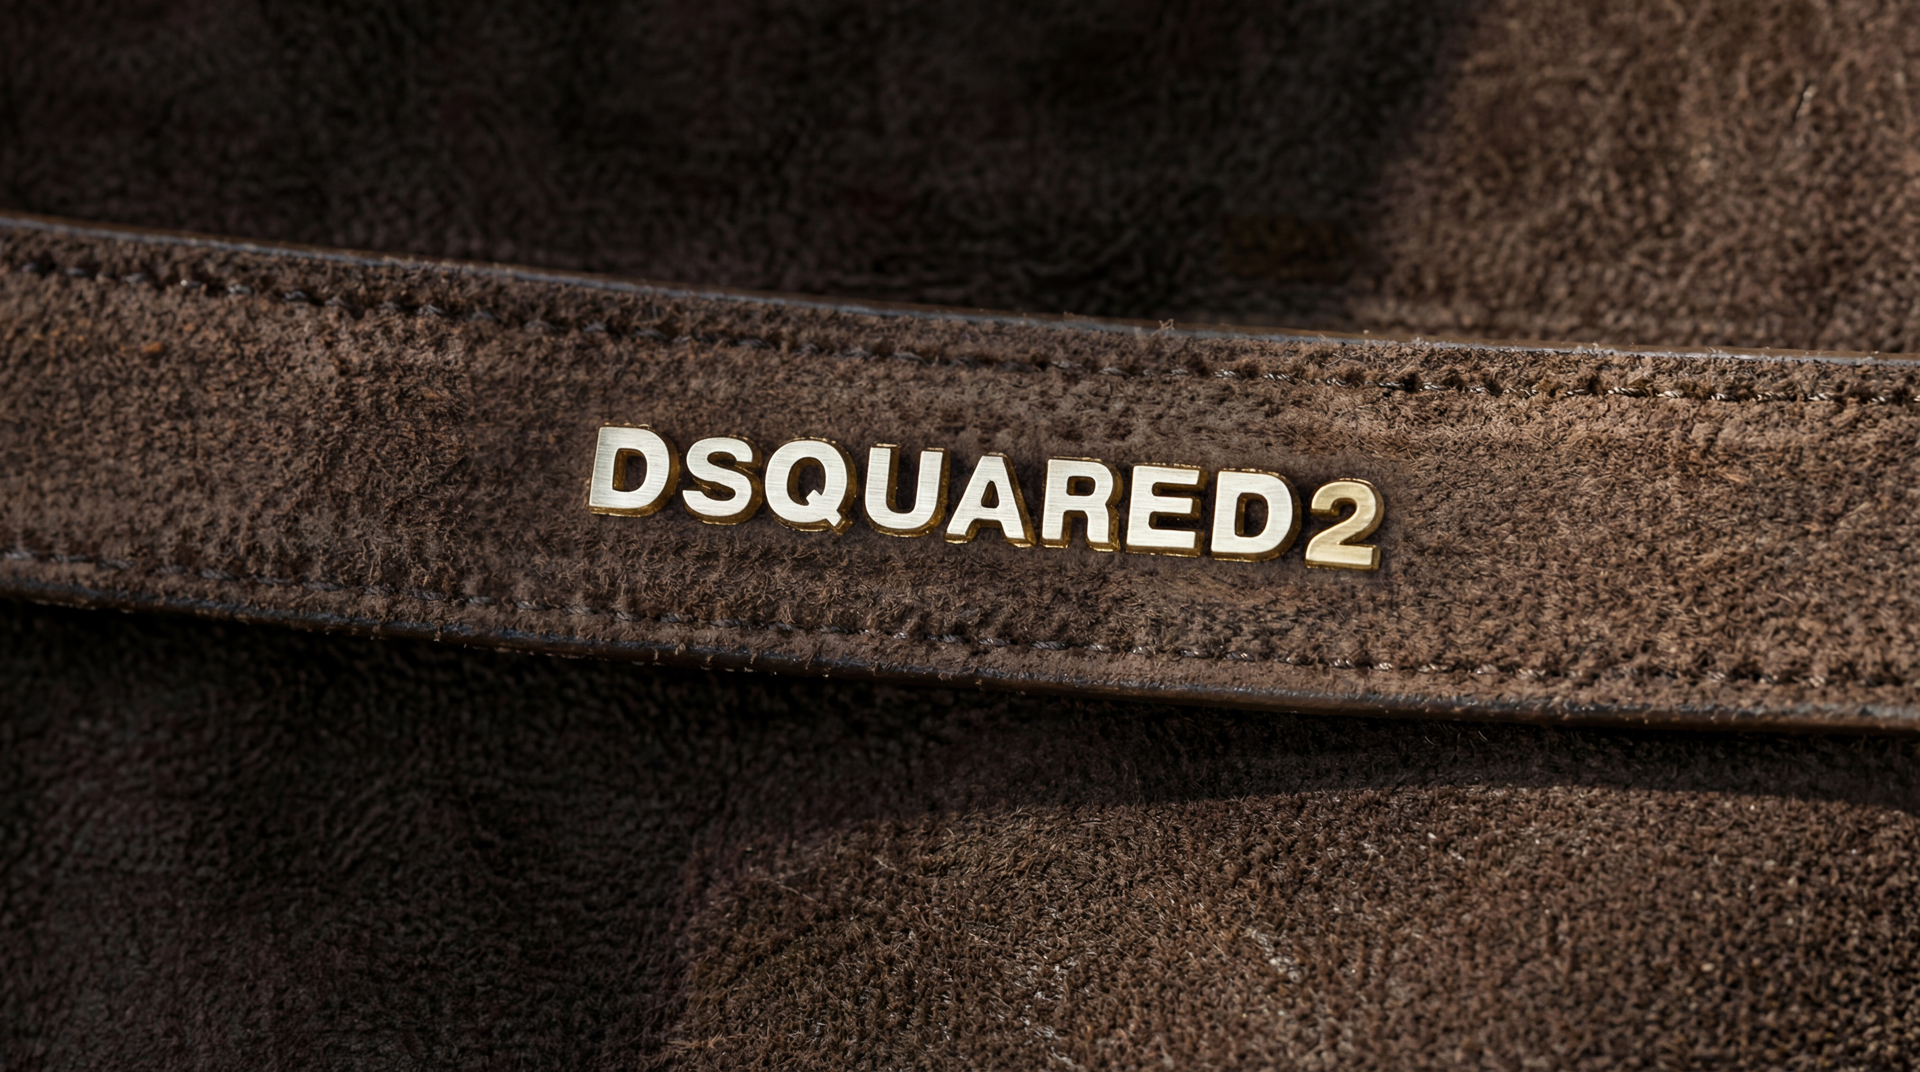
Edit the logo on the jacket in Image 1, ensuring its size and exact positioning remain identical to the current placement in Image 1. However, replace all details of the logo with the precise rendering from Image 2. This includes:

"D2" Embroidery: Replicate the fluffy, raised, off-white chenille texture of the "D2" lettering from Image 2.

Outline: Ensure the camel/tan leather-like outline around the "D2" is accurately matched in color, texture, and stitching detail.

"DSQUARED2" Text: Precisely render the "DSQUARED2" text at the bottom of the logo, matching its font, color, and sharp definition from Image 2.

Underlying Texture: The dark navy blue fabric texture of the jacket where the logo is attached should also be rendered with high fidelity.

The goal is to achieve an ultra-realistic and accurate depiction of the Dsquared2 logo from Image 2, seamlessly integrated into Image 1 at its original position and scale.
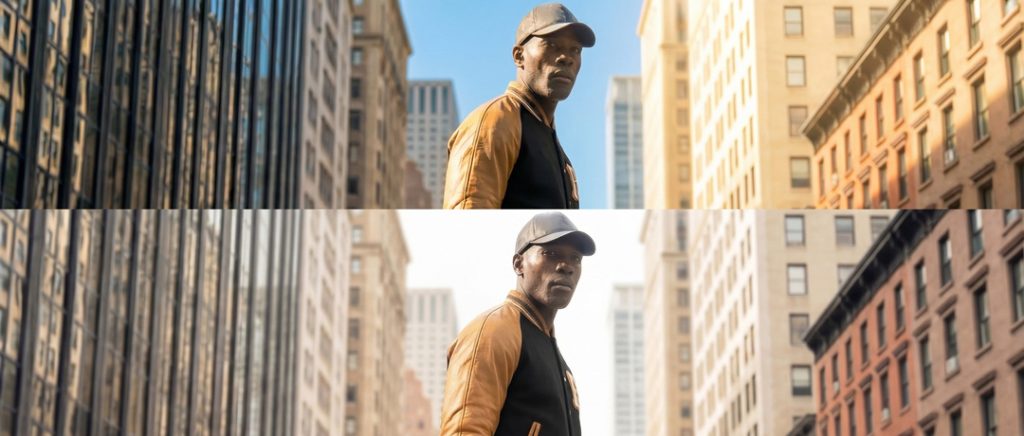
Color Grading
Lighting and color grading are essential for creating cohesive scenes and maintaining a unified visual identity across the project. I begin by editing the lighting and color values of one carefully selected image in Photoshop. This image becomes the master reference for brightness, contrast, tone, and overall mood.
After establishing this reference, I use Nano Banana Pro to apply the same lighting and color grading profile to all other scenes. This allows highlights, shadows, and color balance to remain consistent from frame to frame. Characters, outfits, products, and environments all share the same visual atmosphere, resulting in a smooth and coherent final presentation.
This process ensures that the entire project feels connected, polished, and professionally crafted
Outfit Transition with Kling O1
For the outfit transition stage, I use Kling O1 to create smooth and controlled transformations between looks. Because this model works with a defined starting frame and ending frame, I have full control over how the outfit changes over time.
In each scenario, an object moves in front of the character and acts as a mask. While this object passes across the frame, the transition takes place behind it. The original outfit is hidden and the new outfit is revealed in a seamless way, creating a clean and visually satisfying transformation.
This method keeps the character identity stable while allowing dynamic outfit changes that feel intentional, cinematic, and perfectly synchronized with the motion of the masking object.
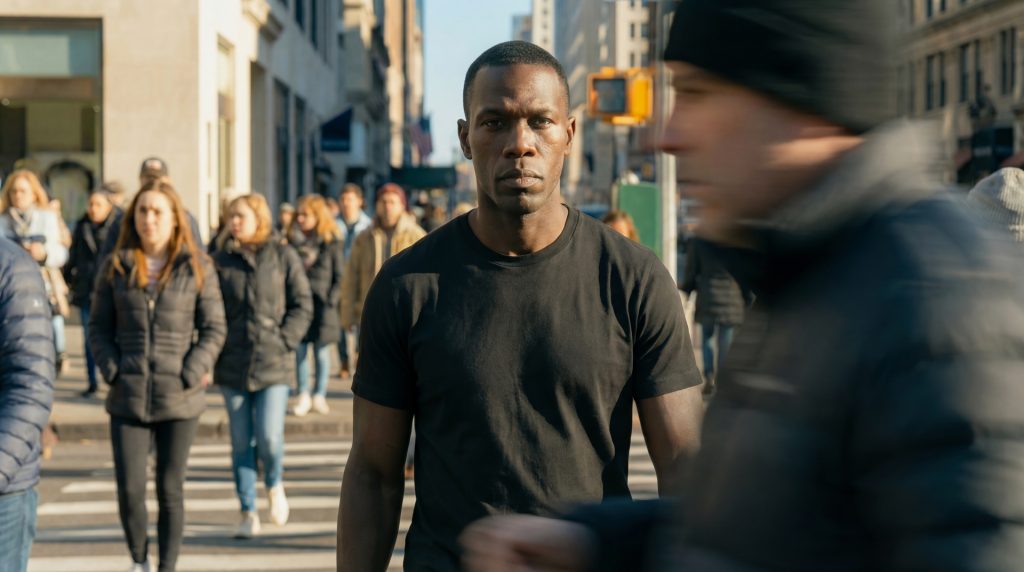
Handheld Camera Movement
Shot 1 – Opening Frame
The video begins with the model standing centered in the frame, wearing a simple black T-shirt. The camera is locked in a medium shot—steady, well-lit, and focused on the model.
Shot 2 – Foreground Movement
A man walks across the foreground from left to right. He passes very close to the lens, creating a natural moment of full-frame occlusion—a smooth, real-world “mask” transition. As he moves in front of the camera, he briefly blocks the entire view of the model.
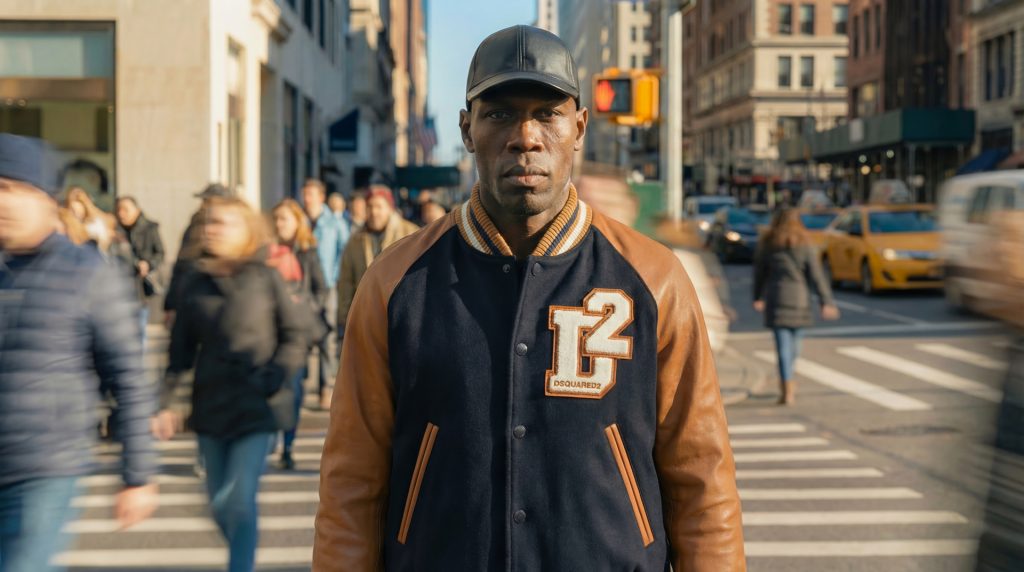
Shot 3 – The Transition Reveal
As the foreground man clears the frame, the model is revealed again—but now wearing the new outfit. The camera position, lighting, and posture remain identical, making the transition feel seamless and magical. The model stands confidently, giving a subtle expression or pose shift to emphasize the transformation.
Shot 4 – Final Look
The camera pushes in slightly or adds a gentle parallax move to highlight details of the new outfit, ending on a crisp, stylish hero shot.
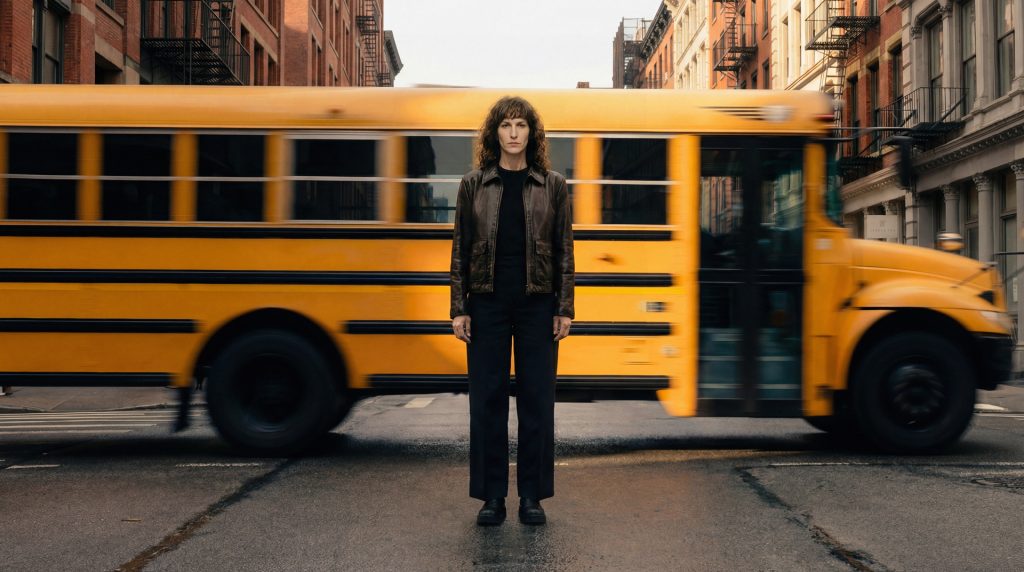
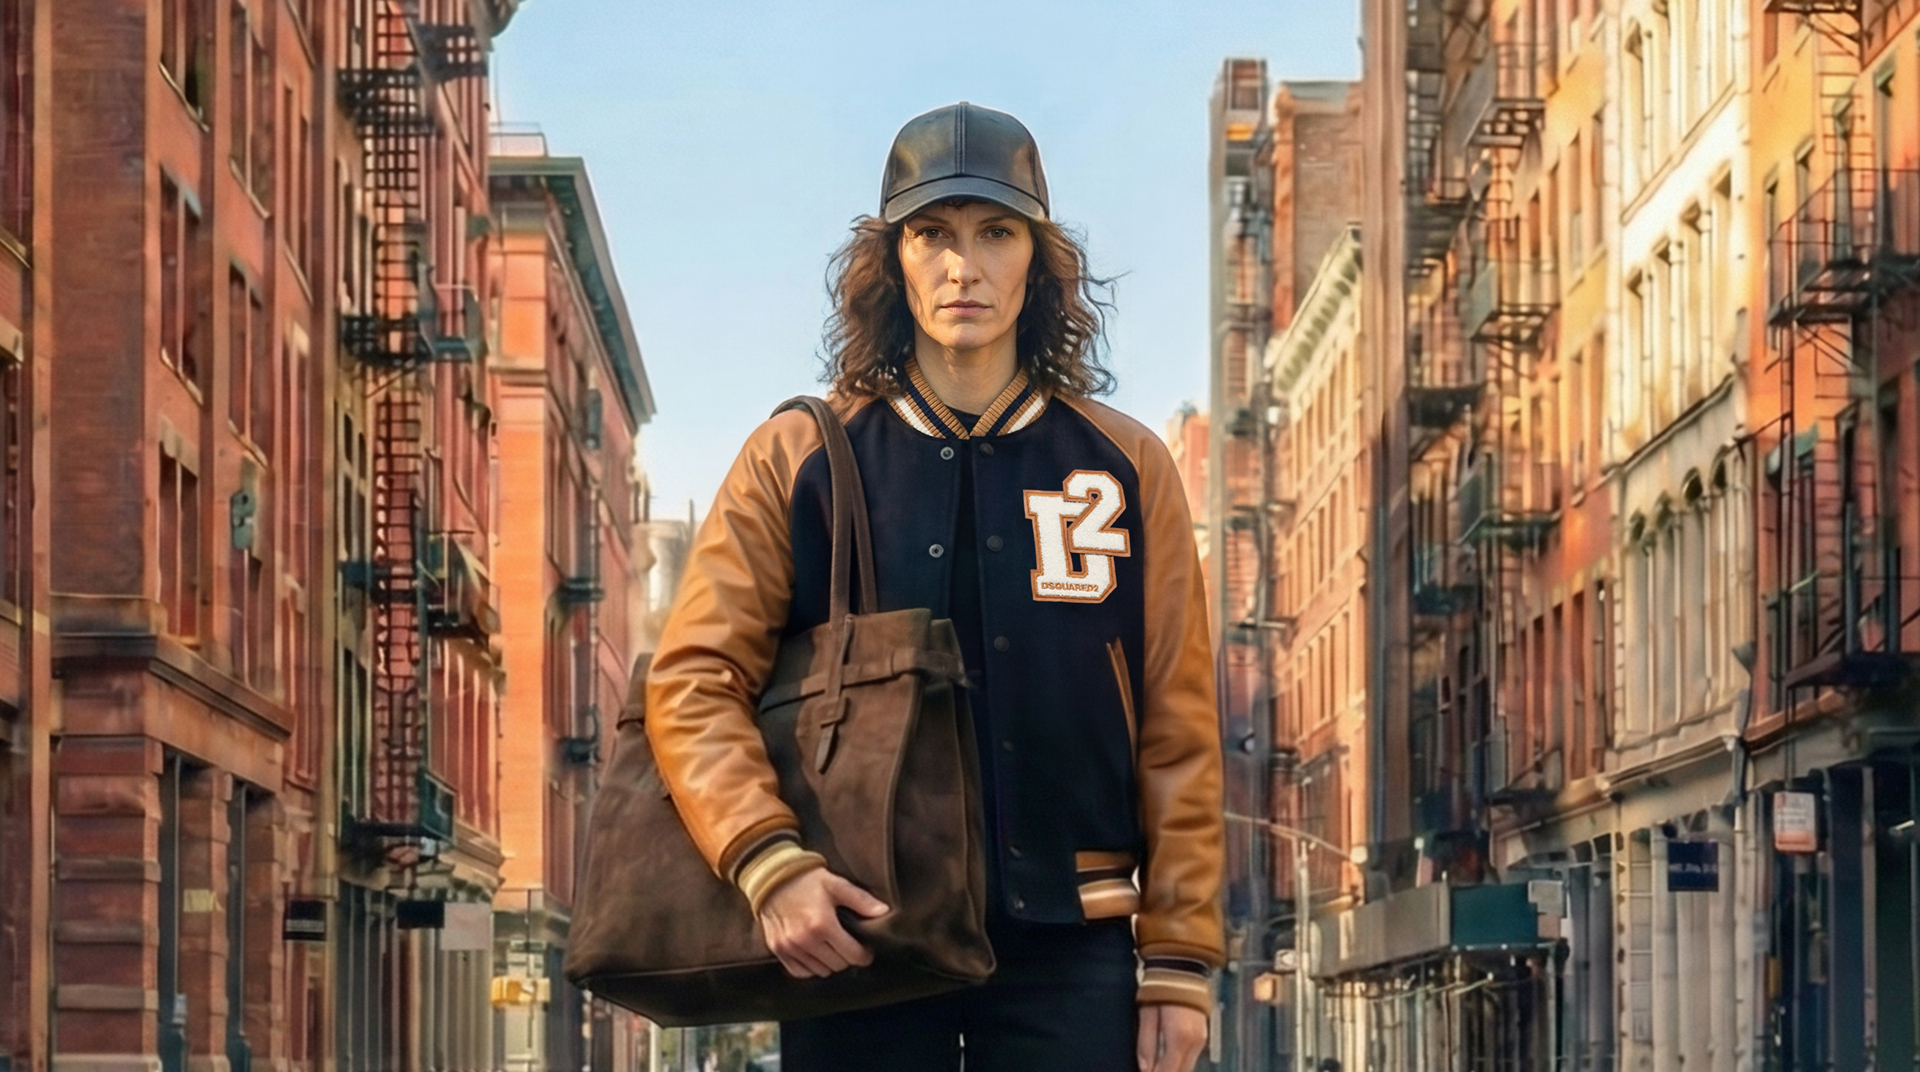
Model: A woman stands centered in the middle of a cobblestone street in a historic downtown city block, flanked by tall, red-brick buildings.
Start Frame: The woman is wearing a brown leather jacket and black pants. A large, yellow American-style school bus is moving rapidly behind her from left to right. (Reference image 06.jpg)
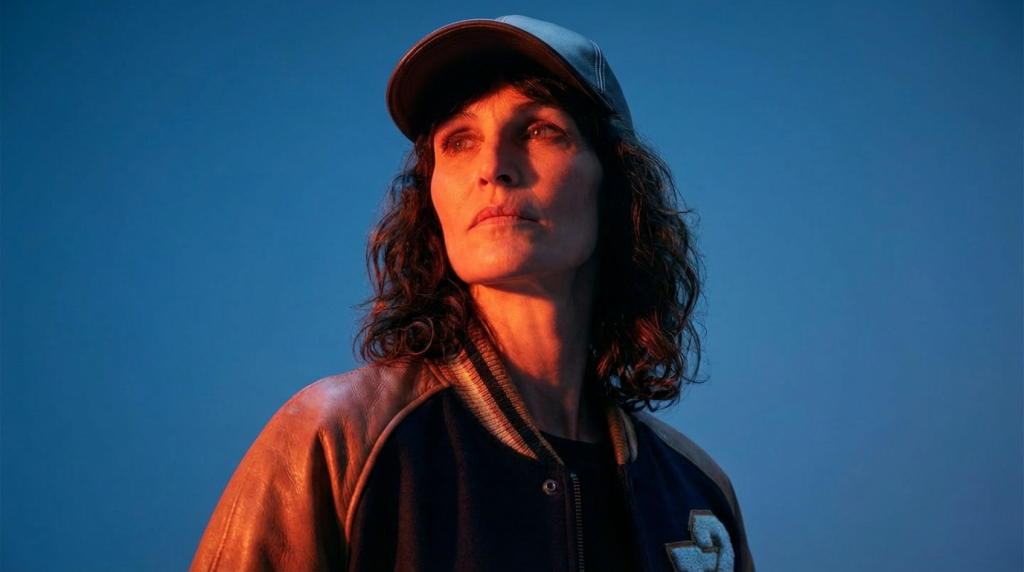
End Frame: The woman is wearing a black and brown letterman jacket, a dark baseball cap, and holding a large brown tote bag. A dark blue luxury sedan is stationary behind her. (Reference image 07.jpg)
Camera and Action Instructions:
Camera Movement: The camera is static (no pan, tilt, or zoom) but exhibits a subtle, natural "handycam" or "breathing" motion (micro-movements/slight shake) throughout the entire clip to give a raw, documentary-style feel.
Transition Action: A separate, dark sedan (or similar vehicle) moves very quickly from right to left, passing immediately in front of the camera and close to the model, completely obscuring her for a brief moment.
Outfit Change/Stop Motion: The moment the fast-moving sedan clears the frame, the model instantly "cuts" to the End Frame look (new outfit, new stationary car in the background). The model's position remains exactly the same.

Single Frame Videos with Kling 2.6
For single-frame video creation, I use Kling 2.6, which is currently one of the newest and most advanced models available. Its high level of stability, detail control, and motion accuracy make it ideal for transforming a single still image into a fluid, realistic video moment.
To achieve precise and manageable results, I use JSON prompting. This structure allows me to define movements, timing, object behavior, and visual constraints with clear parameters. JSON prompts help maintain consistency across outputs and give me full control over how the single frame evolves into motion.
By combining Kling 2.6 with structured JSON prompts, each single frame video gains smooth animation, accurate transitions, and a controlled visual flow that matches the overall project style.
Movement Touch by SAM3
In this stage, I use SAM 3 to identify and isolate specific objects within selected frames. By detecting these elements with precision, I can apply targeted motion effects that enhance the sense of movement without disturbing the rest of the scene.
This approach allows small details such as accessories, fabrics, props, or environmental elements to gain subtle dynamic motion. These controlled effects add energy and depth to the sequence while keeping the main character stable and consistent.
The result is a richer visual experience where motion is used thoughtfully to support the storytelling and elevate the overall presentation.
without super zoom
with super zoom
Intro / Retouched by Beeble
For the intro typography, I explored two different creative approaches to ensure the text integrates smoothly into the scene without visual conflict.
The first approach used a traditional post-production workflow. I applied 3D motion tracking in After Effects to anchor the text accurately within the footage. To enhance depth and separation, I generated a depth map using Beeble. This allowed me to blur background elements selectively so the text would not collide with or visually blend into the environment. The result is a clean, cinematic integration where the typography appears naturally embedded in the shot.
The second approach used a fully AI driven method. I created the typography visuals in Nano Banana Pro and then used Kling 2 to animate the motion. This allowed for more stylized movement and expressive visual behavior while staying consistent with the overall aesthetic. The AI based pipeline offered greater creative flexibility and a faster workflow for exploring alternative styles.
Both methods provided strong results, giving the project two distinct but effective options for introductory typography.
Ending Typography
For the final text sequence, I create a handcrafted stop motion style using Midjourney. Each word is generated as a set of three unique frames, giving the typography a dynamic and organic motion effect. These frames are then arranged in sequence to form a stylized stop motion animation.
After generating the visual assets, I bring the sequence into After Effects to remap the timing. This allows me to fine tune the pacing, rhythm, and impact of each word. The result is a smooth, intentional ending typography effect that feels expressive, handcrafted, and visually connected to the overall project aesthetic.
Sound and Music
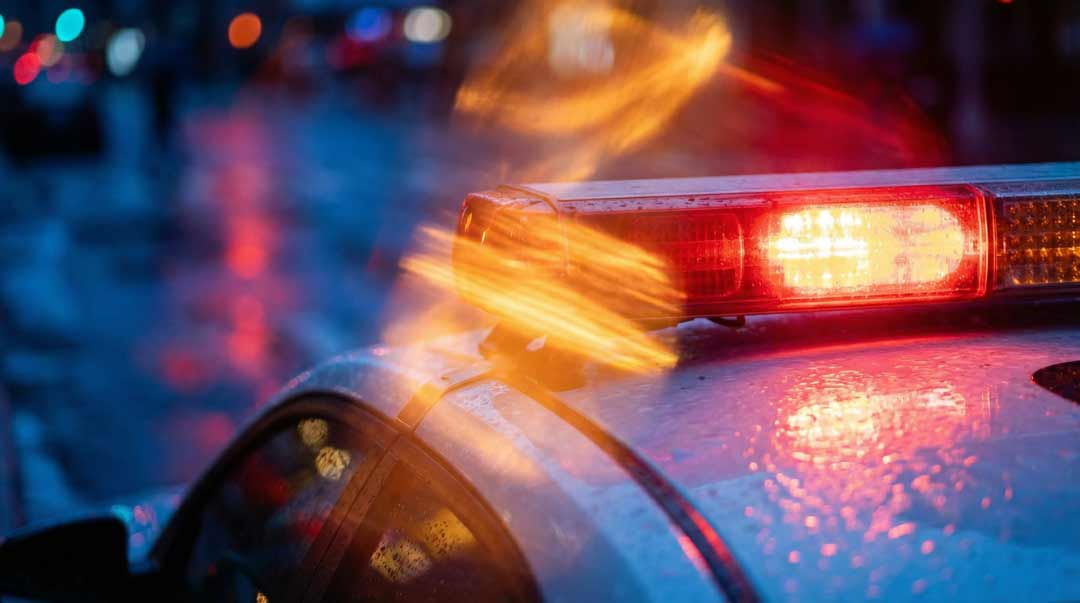
For the audio design, I generated both the main music and the supporting sound effects using Eleven Labs AI. This includes environmental sounds such as street ambience, passing cars, police sirens, and other elements that help shape the atmosphere. By creating these sounds with AI, I could experiment quickly and refine the audio until it matched the exact mood and rhythm of the visual concept.
This approach allowed me to craft a soundtrack that fits the project perfectly, enhancing the emotional tone and strengthening the overall storytelling. The final audio blend supports the visuals with clarity, cohesion, and a cinematic feel.
urban stinger featuring a tight, punchy percussive structure with industrial sound-design elements, low-frequency rumbles, and metallic transients that evoke the texture of concrete and steel. The atmosphere should be dark, modern, and cinematic, built around a compressed, hard-hitting beat with subtle granular noise layers and smooth high-end accents for clarity. Maintain a confident, forward-driving rhythm that feels polished yet gritty, suitable for editorial fashion visuals. No vocals.
After Effects Workflow
I used After Effects as the main tool for assembling, refining, and polishing the final video. The workflow included several key steps:
• Montaging all generated scenes into a coherent sequence
• Editing transitions and adjusting pacing for visual flow
• Remapping timing when necessary to improve rhythm or emphasize specific moments
• Adding visual effects to enhance motion, lighting, or atmosphere
• Matching sound and music precisely with the visual actions
• Ensuring continuity and consistency across all shots